


How to Launch a Token: A Comprehensive Step-by-Step Guide

Launching a token is a powerful way to fund projects, engage communities, and create decentralized ecosystems. Whether you’re an entrepreneur, developer, or startup founder, understanding how to launch a token is critical to success in the blockchain space. This article provides a detailed, step-by-step guide to launching a token, covering everything from the basics to advanced considerations. With clear instructions, actionable insights, and practical resources, you’ll be equipped to navigate the complexities of token creation and deployment.
What Is a Token?
A token is a digital asset built on a blockchain, representing value, utility, or ownership within a specific ecosystem. Unlike cryptocurrencies like Bitcoin or Ethereum, which have their own blockchains, tokens are created on existing blockchains (e.g., Ethereum, Binance Smart Chain) using smart contracts. Tokens can serve various purposes, such as:
- Utility: Granting access to services or products (e.g., paying for decentralized app features).
- Governance: Allowing holders to vote on project decisions.
- Security: Representing ownership in an asset or company (subject to regulations).
- Rewards: Incentivizing users or stakeholders (e.g., staking rewards).
Why Launch a Token?
Launching a token can:
- Raise Funds: Through Initial Coin Offerings (ICOs), Initial DEX Offerings (IDOs), or other crowdfunding models.
- Build Community: Engage users by giving them a stake in your ecosystem.
- Drive Innovation: Enable decentralized applications (dApps) or services.
- Create Incentives: Reward users, developers, or partners for participation.
- Tokenize Assets: Represent real-world assets (e.g., real estate, art) on the blockchain.
However, launching a token requires careful planning, technical expertise, and compliance with regulations. Below is a step-by-step guide to ensure your token launch is successful.
Launch Your Own Token
Step 1: Define Your Token’s Purpose and Vision
Before diving into technical details, clarify why you’re launching a token and what problem it solves.
Actionable Steps:
- Identify the Use Case:
- Is the token for a dApp, a game, a DeFi platform, or a tokenized asset?
- Example: A gaming token might reward players, while a DeFi token could incentivize liquidity provision.
- Define the Value Proposition:
- How does the token benefit users? (e.g., discounts, governance rights, staking rewards)
- Example: Uniswap’s UNI token grants governance rights to holders.
- Set Goals:
- Are you raising funds, building a community, or enabling a service?
- Example: Raise $1M via an IDO to fund dApp development.
- Research Competitors:
- Analyze similar tokens in your niche to identify gaps and opportunities.
- Tool: Use CoinMarketCap or CoinGecko to study competing projects.
Practical Tip: Create a whitepaper outlining your token’s purpose, use case, roadmap, and team. A compelling whitepaper builds trust and attracts investors. Use templates from successful projects like Ethereum or Chainlink as inspiration.
Step 2: Choose a Blockchain Platform
Before you decide to launch a token, keep in mind that selecting the right blockchain is critical, as it determines your token’s functionality, scalability, and costs.
Popular Blockchain Platforms:
- Ethereum:
- Pros: Mature ecosystem, widely adopted, supports ERC-20 (fungible) and ERC-721 (NFT) standards.
- Cons: High gas fees, slower transactions.
- Best for: DeFi, NFTs, and projects needing robust smart contracts.
- Binance Smart Chain (BSC):
- Pros: Low fees, fast transactions, BEP-20 standard.
- Cons: More centralized, smaller developer community.
- Best for: Cost-sensitive projects and DeFi.
- Solana:
- Pros: High throughput, low fees, supports SPL tokens.
- Cons: Less mature, steeper learning curve.
- Best for: High-performance dApps and gaming.
- Polygon:
- Pros: Ethereum-compatible, low fees, fast transactions.
- Cons: Relies on Ethereum’s security.
- Best for: Ethereum-based projects needing scalability.
- Cardano:
- Pros: Energy-efficient, research-driven.
- Cons: Smaller ecosystem, complex development.
- Best for: Long-term, academic-focused projects.
Actionable Steps:
- Evaluate Needs:
- Consider transaction costs, speed, and developer support.
- Example: Choose BSC for low-cost DeFi tokens or Ethereum for broad adoption.
- Check Token Standards:
- Ensure the platform supports your token type (e.g., ERC-20 for fungible tokens, ERC-721 for NFTs).
- Test the Network:
- Deploy a test token on the platform’s testnet (e.g., Ethereum’s Sepolia, BSC Testnet) to evaluate performance.
Practical Tip: Use Alchemy or Infura to connect to Ethereum or other networks for development. For BSC, use BscScan to explore the blockchain. If unsure, start with Ethereum for its ecosystem or BSC for affordability.
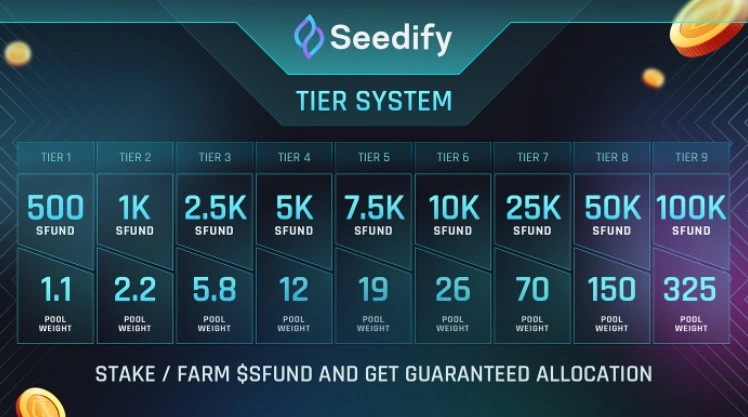
Step 3: Design Tokenomics

Tokenomics (token economics) defines your token’s supply, distribution, and incentives. Poor tokenomics can lead to price volatility or lack of adoption.
Key Components:
- Total Supply: Fixed (e.g., 1B tokens) or inflationary (e.g., mintable over time).
- Example: Bitcoin has a fixed 21M supply, while Ethereum’s supply grows slightly.
- Distribution: Allocate tokens to team, investors, community, and reserves.
- Example: 40% public sale, 20% team (vested), 20% ecosystem, 20% treasury.
- Utility and Incentives: Define how tokens are used (e.g., staking, governance, payments).
- Example: AAVE tokens allow staking for rewards and voting on protocol upgrades.
- Burning or Deflationary Mechanisms: Burn tokens to reduce supply and increase value.
- Example: BNB burns tokens quarterly to reduce supply.
- Vesting and Lockups: Lock team and investor tokens to prevent dumping.
- Example: 2-year vesting for team tokens, released monthly.
Actionable Steps:
- Model Tokenomics: Use spreadsheets to simulate supply, demand, and price impact.
- Tool: Token Terminal for analyzing tokenomics of similar projects.
- Balance Incentives: Ensure rewards align with long-term goals (e.g., staking rewards for holding).
- Avoid Over-Centralization: Limit team allocation (10-20%) and enforce vesting.
- Engage Community: Reserve tokens for airdrops or community rewards to drive adoption.
Practical Tip: Study successful tokenomics (e.g., Chainlink, Polygon) and avoid common pitfalls like excessive team allocation or lack of utility. Use tools like Toke.tools to design and visualize tokenomics.
Step 4: Create a Smart Contract
A smart contract is the code that defines your token’s logic, such as transfers, supply, and functionality.
Actionable Steps:
- Choose a Token Standard:
- ERC-20 (Ethereum): For fungible tokens.
- BEP-20 (BSC): Similar to ERC-20, for BSC.
- ERC-721/1155: For NFTs.
- Use Existing Templates: Leverage OpenZeppelin, a library of secure, audited smart contract templates.
- Example: Use OpenZeppelin’s ERC-20 template to create a fungible token.
- Write the Smart Contract: Use Solidity (Ethereum, BSC, Polygon) or Rust (Solana).
- Example ERC-20 contract (simplified):
solidityCopyEditpragma solidity ^0.8.0;
import "@openzeppelin/contracts/token/ERC20/ERC20.sol";

contract BlokToken is ERC20 {
    constructor(uint256 initialSupply) ERC20("BlokInvestor", "BLOK") {
        _mint(msg.sender, initialSupply);
    }
}
- Test the Contract: Deploy on a testnet (e.g., Ethereum Sepolia, BSC Testnet).
- Use Hardhat or Truffle for testing and deployment.
- Deploy to Mainnet: Use Remix IDE or Hardhat to deploy the contract.
- Pay gas fees (e.g., ETH for Ethereum, BNB for BSC).
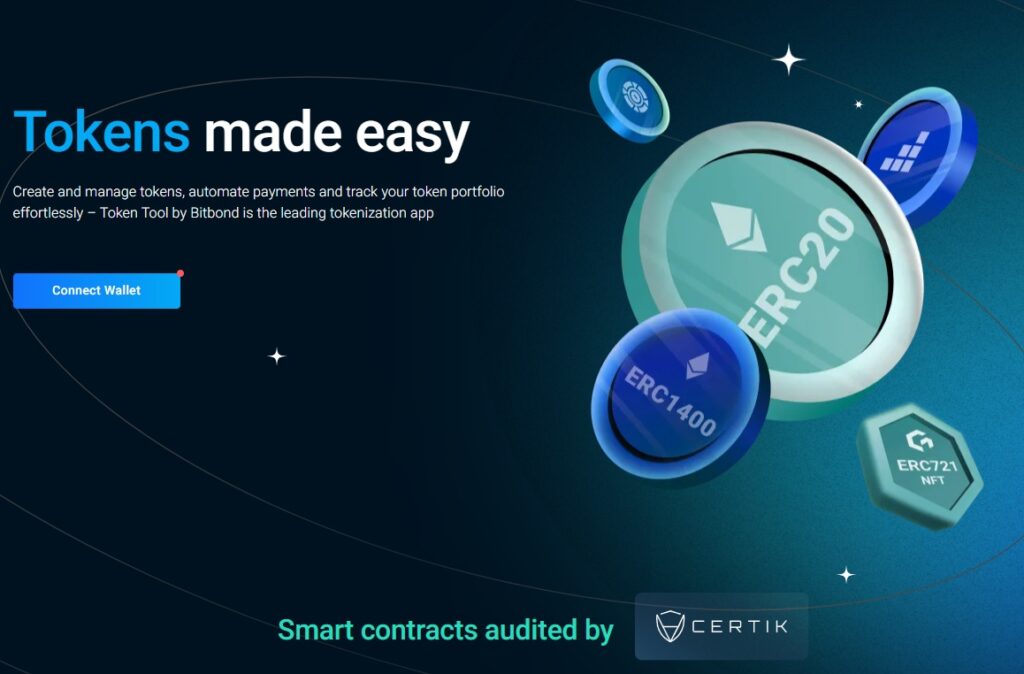
Practical Tip: If you’re not a developer, hire a blockchain developer via Upwork or Toptal, or use no-code platforms like Token Tool (by Bitbond) to create tokens. Always test contracts thoroughly to avoid bugs.
Step 5: Audit the Token
Security audits are essential to identify vulnerabilities in your smart contract and build trust.
Actionable Steps:
- Hire a Reputable Auditor: Firms like CertiK, Quantstamp, or Trail of Bits specialize in smart contract audits.
- Cost: $5,000–$50,000, depending on complexity.
- Perform Internal Testing: Use tools like Slither or MythX to scan for vulnerabilities.
- Fix Issues: Address audit findings and redeploy the contract if needed.
- Publish Audit Reports: Share audit results in your whitepaper or website to build credibility.
Practical Tip: Start with automated tools like Slither for preliminary checks, then invest in a professional audit for mainnet deployment. Avoid skipping audits, as hacks can destroy your project’s reputation
Step 6: Market Your Token
Effective marketing drives awareness, adoption, and investment.
Actionable Steps:
1. Build a Brand:
- Create a professional website, logo, and social media presence (Twitter, Discord, Telegram).
- Example: Use Hostinger for quick website setup.
2. Engage the Community:
- Host AMAs (Ask Me Anything) on Discord or Twitter Spaces.
- Airdrop tokens to early adopters to build loyalty.
3. Leverage Influencers:
- Partner with crypto influencers on YouTube or Twitter.
- Example: Reach out via Key Opinion Leader (KOL) platforms like HypeAuditor.
4. Content Marketing:
- Publish blog posts, videos, or tutorials about your project.
- Submit articles to CoinTelegraph or The Block for exposure.
5. Run a Token Sale:
- Options: ICO, IDO (e.g., on PancakeSwap), or IEO (via exchanges like Binance).
- Use platforms like Polkastarter or DAO Maker for IDOs.
Practical Tip:
Focus on transparency—share your roadmap, team details, and audit reports. Avoid overhyped claims, as they can erode trust. Use CoinMarketCap or CoinGecko to apply for token listings and increase visibility.

Step 7: Navigate Legal Considerations
Token launches are subject to regulations, varying by jurisdiction.
Key Considerations:
1. Securities Laws:
- Security tokens (representing ownership) may fall under securities regulations (e.g., SEC in the US).
- Utility tokens are less regulated but still require scrutiny.
2. KYC/AML:
- Implement Know Your Customer (KYC) and Anti-Money Laundering (AML) checks for token sales.
- Tools: Sumsub or Onfido for KYC integration.
3. Jurisdiction:
- Crypto-friendly jurisdictions include Switzerland, Singapore, and Malta.
- Avoid launching in restrictive regions without legal advice.
4. Tax Compliance:
- Token sales may trigger capital gains or income tax.
- Consult a tax professional familiar with crypto.
Actionable Steps:
1. Hire a Crypto Lawyer:
- Firms like DLx Law or Perkins Coie specialize in blockchain law.
2. Draft Legal Documents:
- Create a Terms of Service and Token Sale Agreement.
- Use templates from OpenLaw or consult a lawyer.
3. Check Local Regulations:
- Review guidelines from regulators like the SEC, FCA (UK), or MAS (Singapore).
Practical Tip:
Engage a lawyer early to classify your token (utility vs. security) and ensure compliance. Budget $10,000–$50,000 for legal fees, depending on complexity.
Step 8: List Your Token

Listing your token on exchanges or decentralized platforms enables trading and liquidity.
Actionable Steps:
1. Choose a Listing Type:
- Centralized Exchanges (CEX): Binance, KuCoin, Gate.io.
- Pros: High visibility, liquidity.
- Cons: High fees ($10,000–$100,000), strict requirements.
- Decentralized Exchanges (DEX): Uniswap, PancakeSwap, SushiSwap.
- Pros: Lower costs, easier to list.
- Cons: Requires liquidity pools.
2. Set Up Liquidity Pools (DEX):
- Pair your token with a stablecoin (e.g., USDT) or native token (e.g., ETH, BNB).
- Example: On Uniswap, deposit 50% BLOK and 50% ETH to create a pool.
- Tool: Uniswap V3 or PancakeSwap for liquidity provision.
3. Apply to Exchanges:
- Submit applications to CEXs with your whitepaper, audit reports, and KYC details.
- Start with smaller exchanges like MEXC or BitMart for easier entry.
4. Maintain Liquidity:
- Lock liquidity pool tokens (e.g., via Unicrypt) to prevent rug pulls.
- Monitor trading volume and add liquidity as needed.
Practical Tip:
Start with a DEX like Uniswap for quick listing ($500–$5,000 in fees) and aim for CEXs later. Use CoinMarketCap and CoinGecko to boost visibility post-listing.
Additional Tips for Success
1. Build a Team:
- Assemble developers, marketers, and legal experts. Use CryptoJobs to hire talent.
2. Monitor Metrics:
- Track token price, trading volume, and community growth using DappRadar or Nansen.
3. Iterate:
- Gather community feedback and update your roadmap to stay competitive.
4. Stay Secure:
- Use multi-signature wallets (e.g., Gnosis Safe) for treasury management and enable two-factor authentication (2FA) for all accounts.
Useful Resources and Tools
Development:
OpenZeppelin, Hardhat, Truffle
Audits:
CertiK, Quantstamp, Slither, MythX
Tokenomics:
Toke.tools, Token Terminal
Marketing:
CoinMarketCap, CoinGecko, HypeAuditor
Legal / Compliance:
DLx Law, Perkins Coie, Sumsub
Listing / Launchpads:
Uniswap, PancakeSwap, Unicrypt
Explorers:
Etherscan, BscScan, Solscan
Conclusion
Anybody can launch a token, but most people don’t know that it’s a multifaceted process requiring technical, economic, and legal expertise. By defining a clear purpose, choosing the right blockchain, designing robust tokenomics, auditing smart contracts, marketing effectively, navigating regulations, and listing strategically, you can create a successful token that drives value for your project and community. Start small, test thoroughly, and engage your audience transparently to build trust and adoption.
Ready to launch your token? Start with a solid whitepaper, experiment on a testnet, and make sure you consult experts to ensure full compliance and security. The blockchain space evolves fast—staying informed and adaptable is the key to long-term success.
Want to take the next step?
Create your website on Hostinger with a 20% discount and start your crypto journey.
Also check out our full guide on building your first DApp in 2025
No coding? No problem. You’ve got this. Thank you for visiting BlokInvestor.
Disclaimer: The content on this website is for informational and educational purposes only and should not be considered financial, investment, or legal advice. We are not financial advisors, and the opinions expressed here are not a substitute for professional financial guidance. Cryptocurrency investments carry significant risks, including the potential for financial loss. Always conduct your own research and consult with a qualified financial advisor before making any investment decisions. We are not responsible for any financial losses or damages resulting from the use of the information provided on this site. This post contains affiliate links and we may earn a commission if you sign up, at no extra cost to you.

Post Comment